Enable hardware acceleration for Jellyfin in Kubernetes - AMD Edition
2024-06-24
Jellyfin is an open-source media server software that allows users to manage and stream their personal collection of movies, TV shows, music, and other media files. It is designed as an alternative to proprietary media server solutions like Plex and Emby, offering similar functionality but without any licensing costs or restrictions.
Jellyfin is running in my bare-metal kubernetes cluster. However, running the container without additional configuraion only gives Jellyfin access to the CPU for decoding video streams. If a GPU is available it would be better to use the GPU as it - most of the time - also has hardware acceleration for well-known codecs and in addition it takes some work off the CPU. In my case, the Athlon 3000G has an on-board Vega 3 graphics chip. Now the only thing left to do is to give Jellyfin access to the GPU.
The steps are based on the official jellyfin documentation and if you have an other CPU/GPU combination or want to use a different method, please refer to it.
Prerequisits
To allow hardware acceleration, the kubernetes pod needs access to the GPU interface. For AMD devices such as mine, we need to make sure that the VA-API is available and that Jellyfin is only run on a node that has the GPU interface available.
Check if Hardware Acceleration is available
The specific device on AMD based systems is called renderD128. To check if such a device is available on your system use the following command.
| |
The output should look something like this:
| |
renderD128 is the device we are looking for. The respective name depends on your device and configuration.
Make sure Jellyfin only runs on nodes with AMD GPU
Since we are using hostpath to mount the device into the Jellyfin pod, we need to ensure that the pod is spawned on node with the respective device. This is achieved by labeling the nodes with hardware acceleration capabiltiies and by adjusting the deployments node-selector:
| |
Note: The label and the label value can be chosen arbitrarily.
Enable Hardware Acceleration
Mount the hardware device into the container
We need to make sure that the container has access to the hardware device.
| |
Docker has a dedicated option, but in Kubernetes we rely on a volume mount from the hostpath to give access to the device. In addition to mounting the device we need to make sure that the pod is allowed to use the device. This is done by elevating the securityContext and by adjusting the group membership using fsGroup. The value has to match the group on the host system of the device.
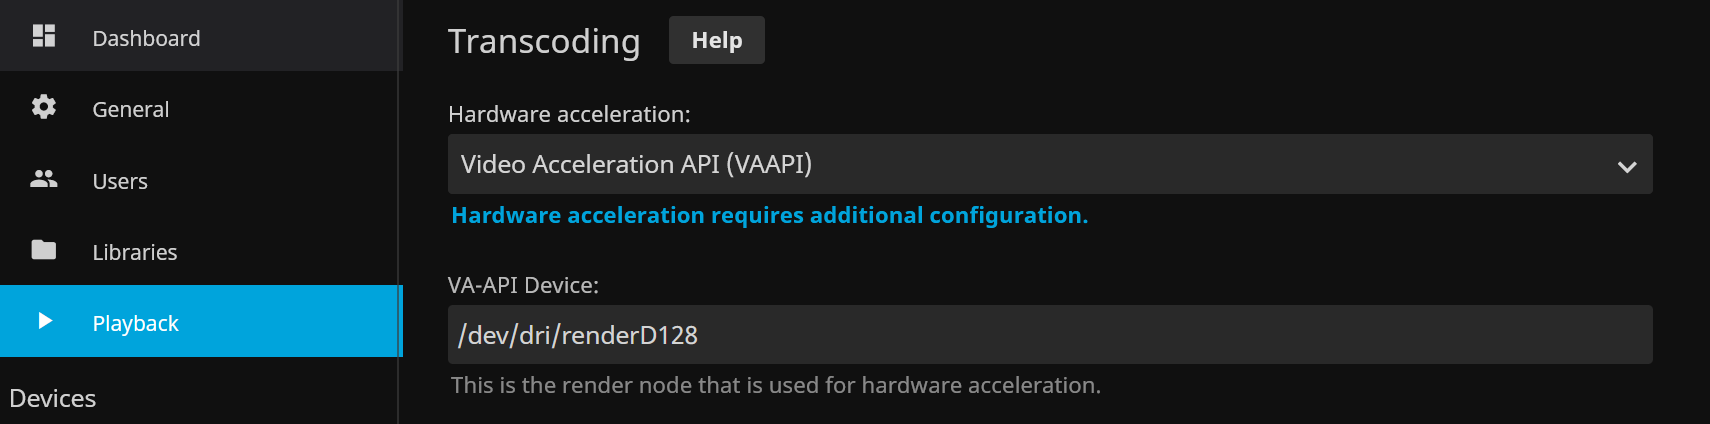
Configure Jellyfin
Now that the pod is up and running, Jellyfin need to know that hardware acceleration is available. We do this by selecting the VA-API option and entering the mounted hardware device path.
In addition we need to check the supported codecs. The easiest option is to exec into the pod and use Jellyfin directly. This also verifies if the deployment has mounted everything correclty. If everything is working, the output of the following command:
| |
looks like this:
| |
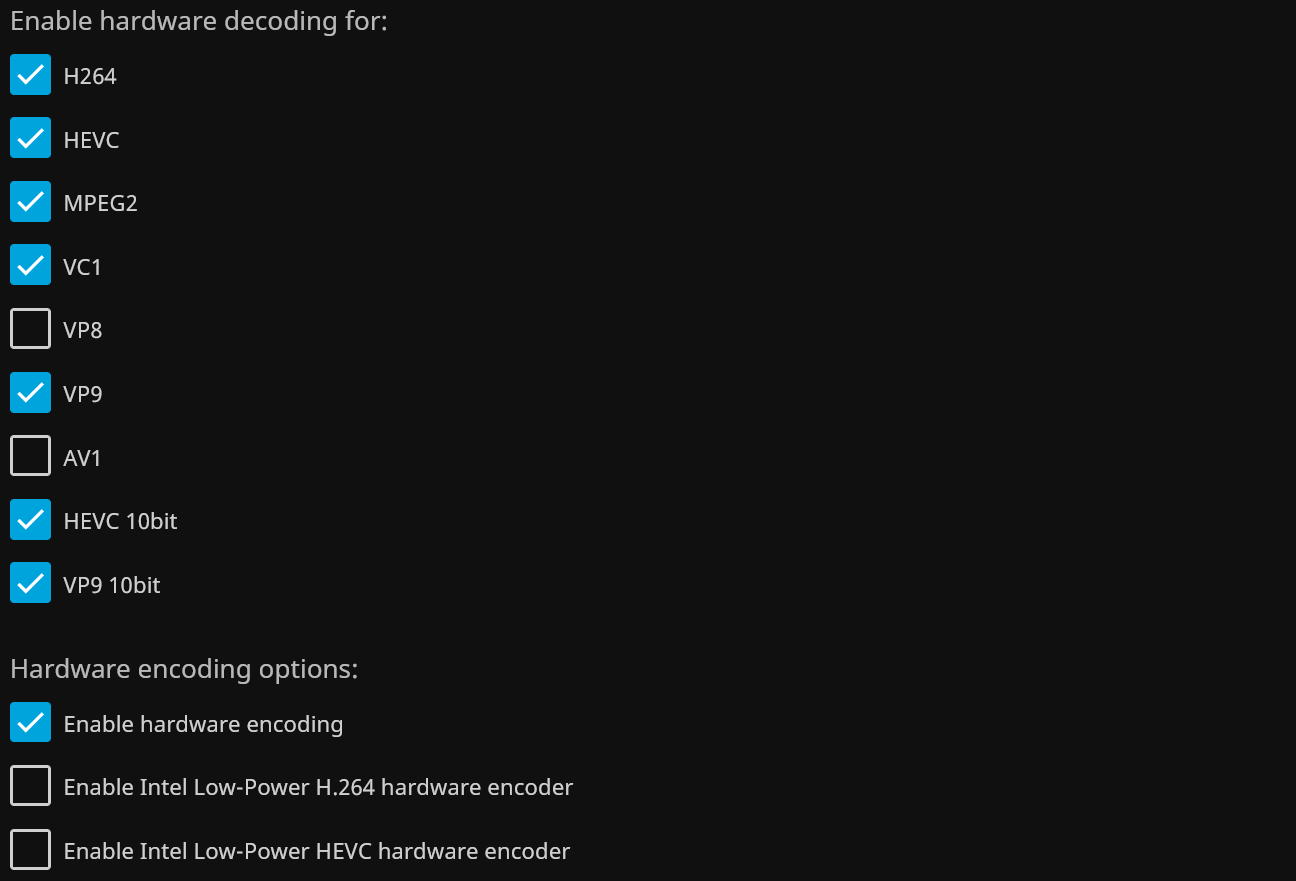
The VA profiles now allow us to map everything to the configuration from Jellyfin. The official mapping from the Jellyfin team can be found here.
The final configuration for my system looks like this:
Check if hardware acceleration is working
Now everything - at least the hardware acceleration - should run smoothly. To check we simply start a movie of our library that is encoded with one of the above checked codecs. After a couple of seconds we can check the Jellyfin logs to see if ffmpeg has been started with the correct options:
| |
If you see a video and nothing is crashing you are good to go.